

GitHub
Data appsDEPRECATED
Hosting data apps on Observable Cloud was deprecated on April 15, 2025. We encourage you to migrate to your preferred static site hosting provider. We will discontinue building and deploying of data apps to Observable Cloud on October 15, 2025. Read more →
Connecting your data app to a GitHub repository gives Observable access to the source code of your app. This is a requirement for building and deploying in the cloud.
INFO
Let us know if you’d be interested in support for GitLab (upvote #650), Hugging Face (#651), or other version control hosts.
Connecting to GitHub
On Observable, under the “Data apps” area of the top navigation bar, your data apps are listed along the left sidebar. Select your data app to see app settings.
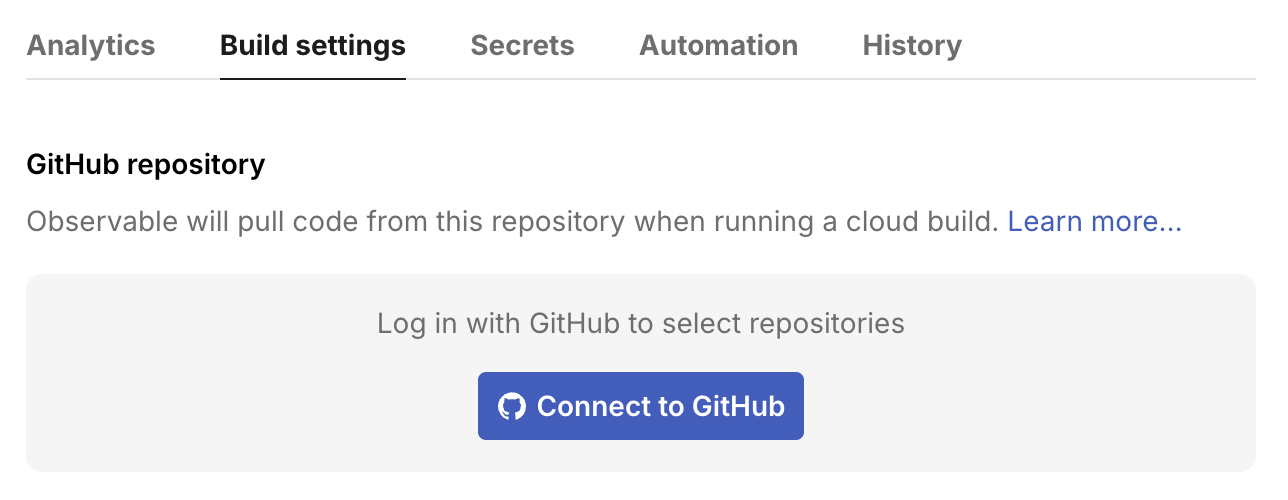
Go to the “Build settings” tab, click “Connect to GitHub”, and follow the prompts.
TIP
If your data app is not listed, remember to first deploy it from the command line.
Linking a repository
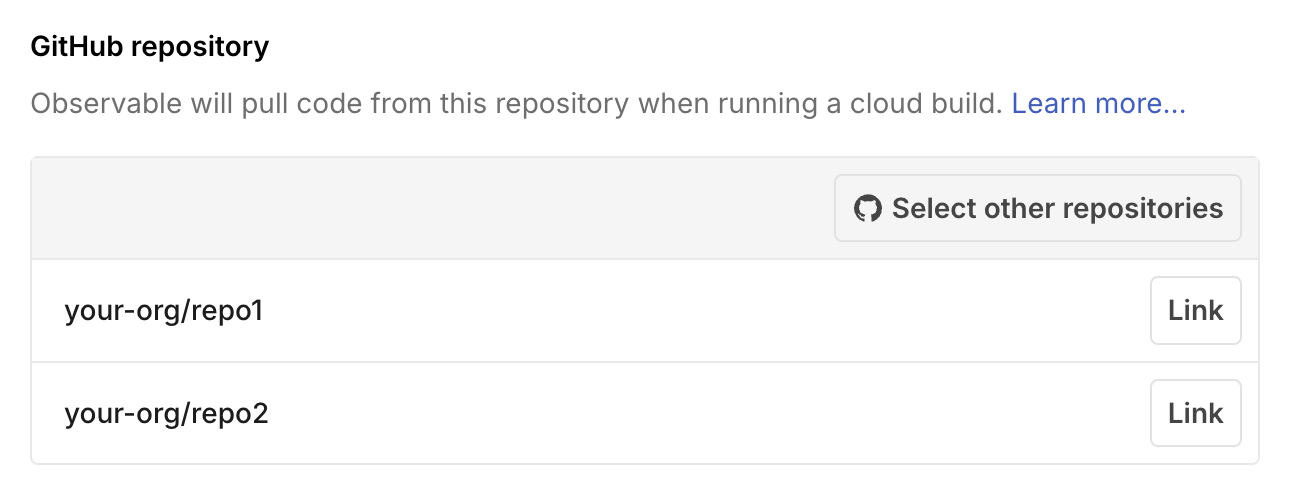
Once connected, click “Select other repositories” and grant Observable access to your repository, then click “Link” to link it to your project.
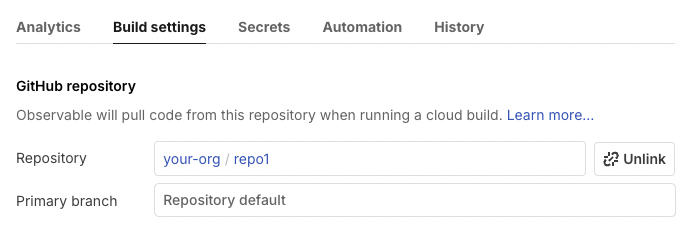
After linking a repository, you can pick a “Primary branch” to build from or leave it blank to use the repository default (typically main).
Now you’re all set up! You’ll now see a “GitHub” link in the metadata under your data app’s title to take you to your app’s source code.
Try clicking “Deploy” from the app settings page to start a manual deploy from your source, or push some new code up to your configured branch to trigger a deploy.
INFO
Currently, your Framework project must be in the root directory of your repository; upvote #649.
Automatic deploys
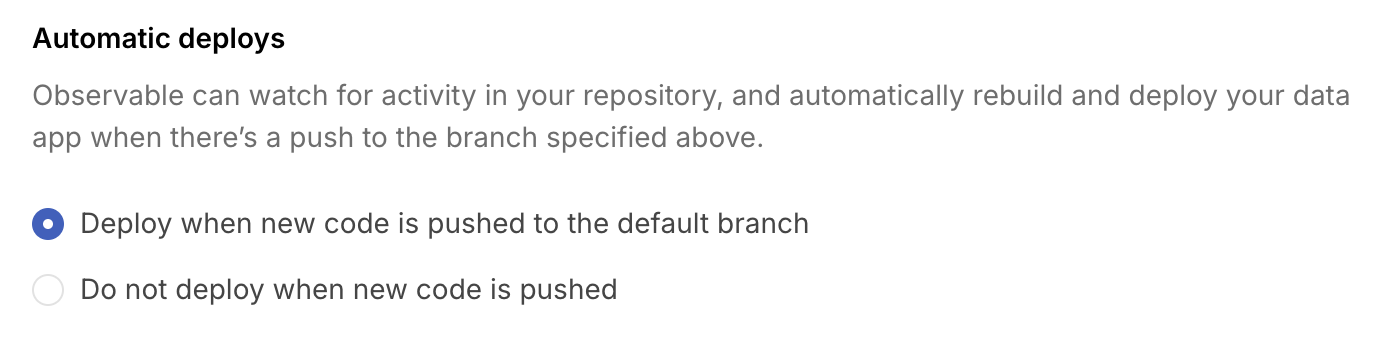
By default, data apps build and deploy automatically when new code is pushed to your branch; if you’d like to disable automatic deploys, you can do so in the “Automatic deploys” section in the “Build settings” tab.
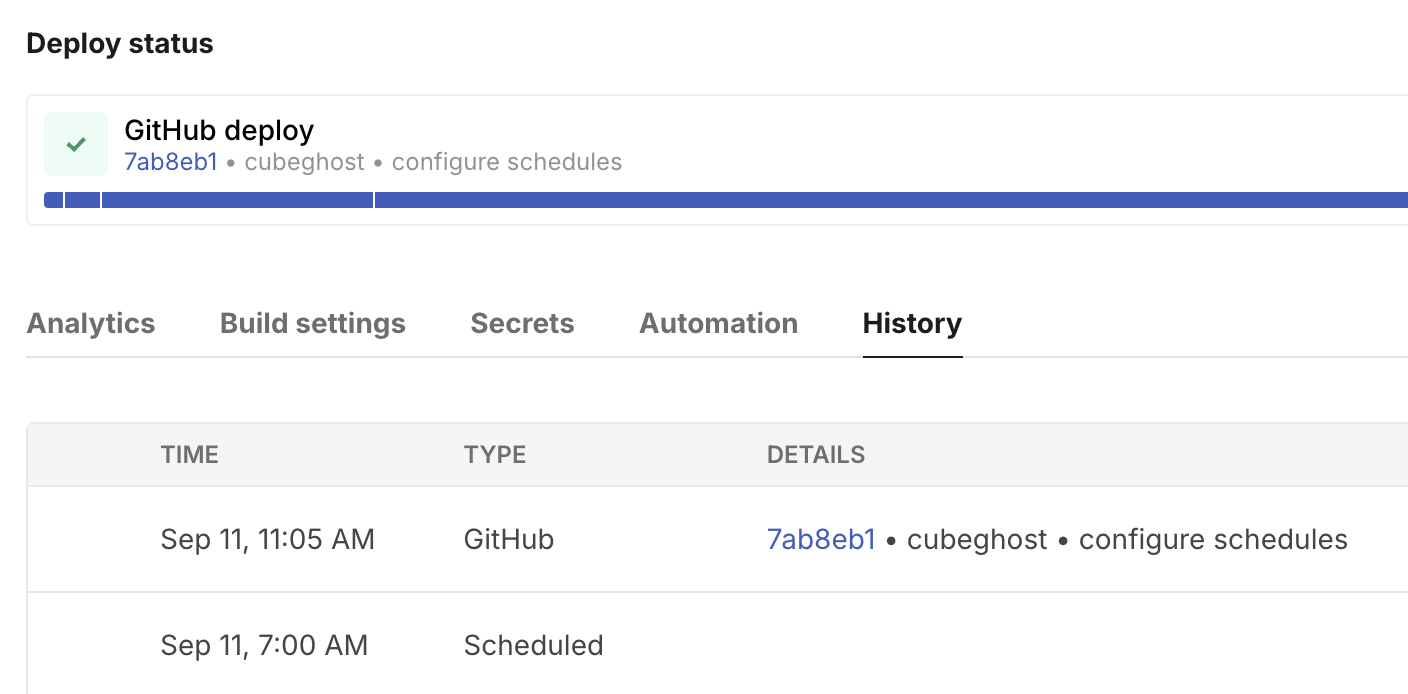
When automatic deploys are enabled, your commits on GitHub and your deploys on Observable will be linked to each other.
On Observable, deploys show the commit message and hash (e.g., 7ab8eb1); click the hash to go to the commit on GitHub. In the screenshot below, the second row in the history table does not list a hash or commit message because it was triggered by a schedule, not a GitHub commit.
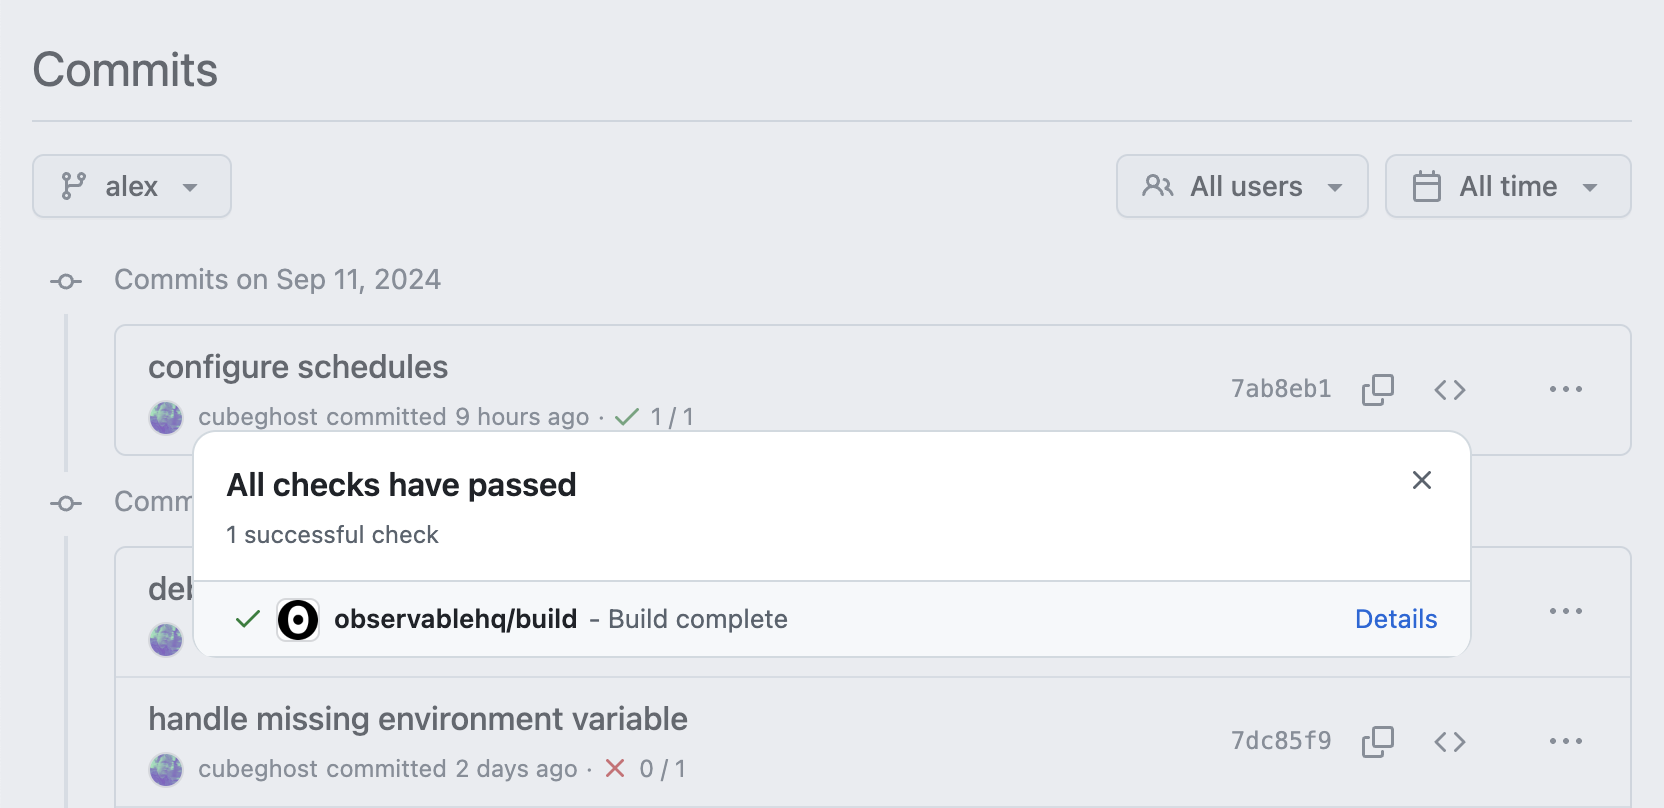
On GitHub, commits show a commit status: a or , depending on whether the build succeeded or failed. Click the icon and then click “Details” in the pop-up (shown open below) to go to the deploy on Observable, where you can see the logs.
Learn more about building and deploying.