Embedding
Data appsEnterpriseLearn more about EnterpriseDEPRECATED
Hosting data apps on Observable Cloud was deprecated on April 15, 2025. We encourage you to migrate to your preferred static site hosting provider. We will discontinue building and deploying of data apps to Observable Cloud on October 15, 2025. Read more →
Data apps can export components you can embed in any other website or application. For example, you can write your custom charts in Observable Framework, then export them to use as an interactive animated component in a React application, or as a static SVG you can use everywhere you can put images.
Use Framework to export JavaScript modules and other files; then, deploy your data app to Observable Cloud to control secure private embedding with CORS and signing keys, and see analytics on which exports are getting used.
This lets data teams build analyses and visualizations you can integrate into production sites or existing dashboards. The parent application doesn’t have to think about loading or processing the data; your exports get “baked out” as fast-loading static assets whenever your data app rebuilds.
TIP
Observable Cloud embedding features require Observable Framework 1.13.0 or above, and require you to build in the cloud.
Example
In your Framework project, you can write a vanilla JavaScript module that exports a function (PedestrianChart) that loads a JSON generated by a data loader (foot-traffic.json) and returns a line chart as a DOM element:
import * as Plot from "npm:@observablehq/plot";
import {FileAttachment} from "observablehq:stdlib";
export async function PedestrianChart() {
  return Plot.lineY(
    await FileAttachment("./foot-traffic.json").json(),
    {x: "Date", y: "PedestrianCount"}
  ).plot();
}
Export the module by adding it to the dynamicPaths array in your config file:
export default {
  // ...
  "dynamicPaths": ["/pedestrians-chart.js"]
}
Deploy your data app to Observable to host it in our cloud. You’ll see your export listed in the “Exports” tab of your data app settings. Configure CORS to say which sites are allowed to embed your module, and make your data app public (or use signing keys for secure private embedding). Set a schedule to keep the data fresh.
Then, in your own website, import PedestrianChart and append the DOM element it returns:
<div id="pedestrian-chart"></div>
<script type="module">
  import {PedestrianChart} from "https://acme.observablehq.com/store-stats/pedestrian-chart.js";
  const target = document.querySelector("#pedestrian-chart");
  target.appendChild(PedestrianChart());
</script>
You could also write a data loader that generates an SVG you can embed with an HTML img tag. Or generate JSON you can load with a JavaScript fetch. Or use parameterized routes to generate many versions at once.
For more examples:
Exports
Like with pages, you can view a list of your data app’s exports under the “Exports” tab of app settings. This lists the exports configured in your most recent deploy’s config file’s dynamicPaths. There are two types: JavaScript modules, which end in .js, and files, which could end in anything else (.svg, .png, .json, .csv…).
![A table of exports, with columns “Export”, “Viewers by day”, “Total”, and “Type”, and rows “All exports”, “/app/[id]/[type]/summary.js”, and then, under “Deleted exports”, “/app/[id]/[type]/index.md” and “/app/[id]/summary.js”.](/documentation/assets/exports.DvENB0YI.png)
When you use parameterized routes, all the different instances of the export are shown as one row named after the source file that generates them. The number of identified instances is shown in parentheses after the source file name.
Modules show analytics for how many unique individuals have run them on every given day. Analytics are not yet available for files. Learn more about analytics.
CORS
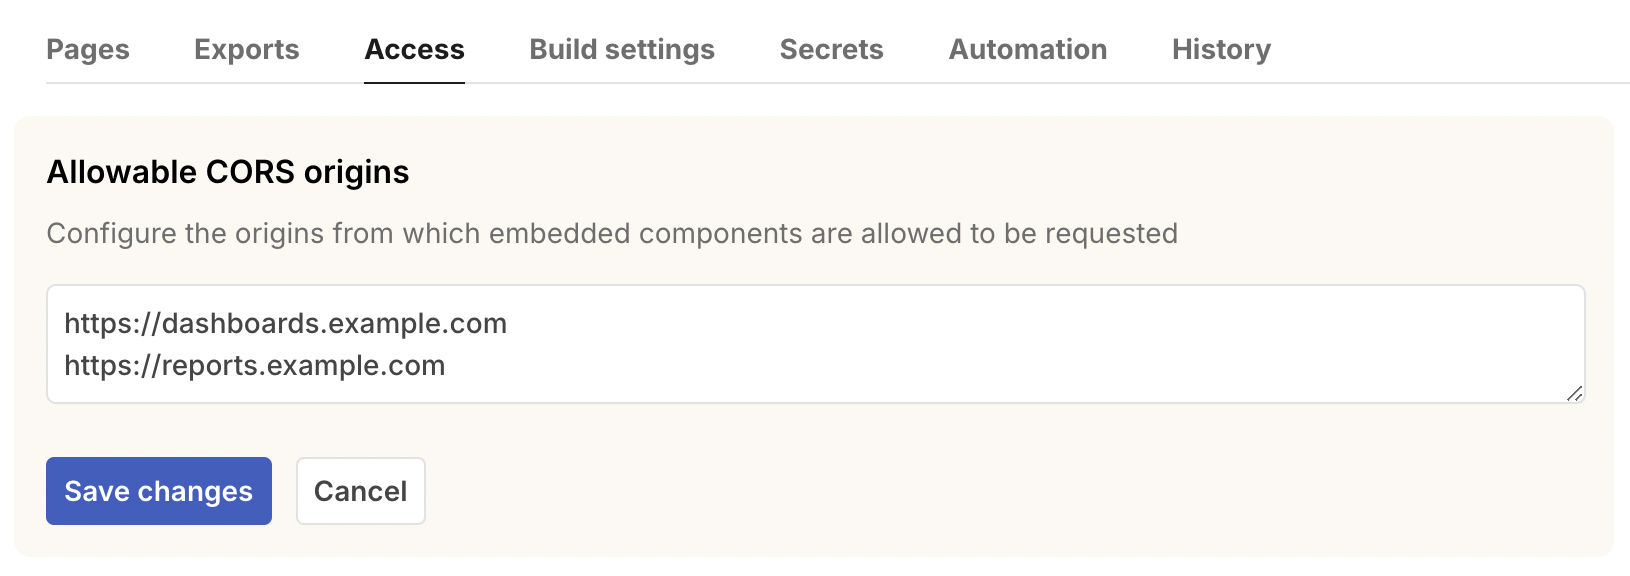
Under the “Access” tab of app settings, “Allowable CORS origins” lets you configure which domains should be able to embed your data app’s exports. Add allowed origins, like “https://example.com”, each on a new line, or just put * in the field and save to allow all origins.

This is required because browsers check the Cross-Origin Resource Sharing settings of any third-party server before allowing import and fetch. In contrast, images can be embedded with an <img> tag without needing to configure CORS.
Signing keys
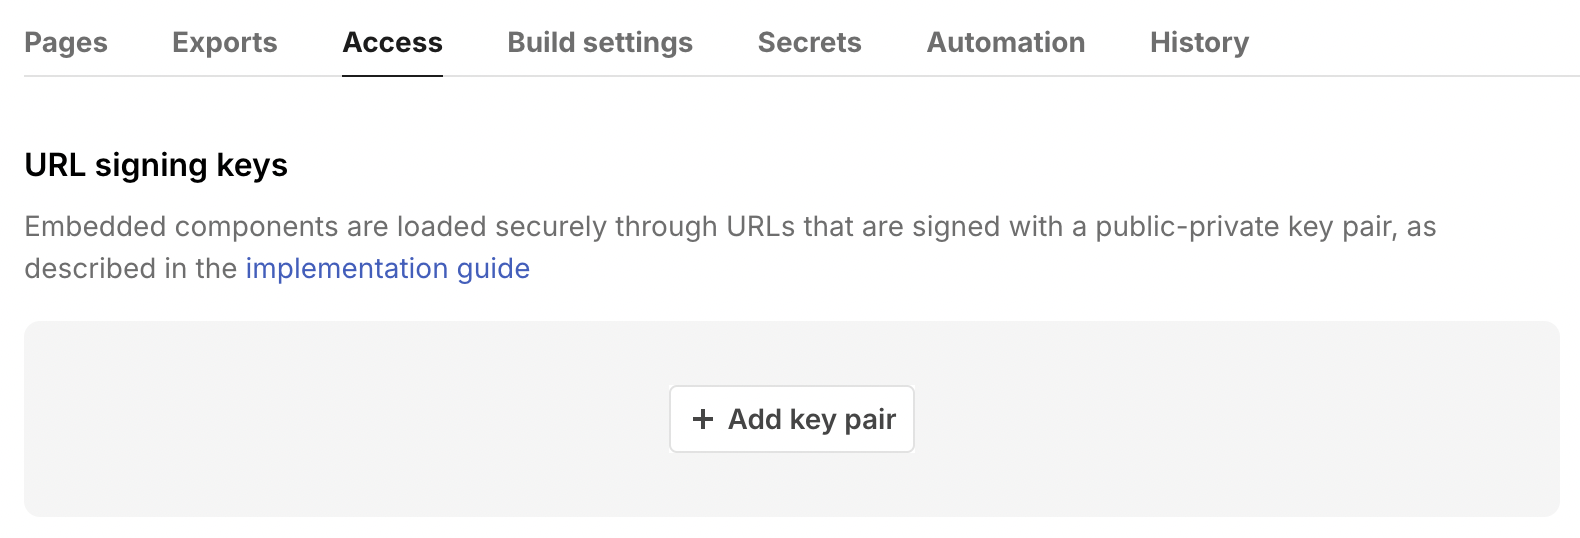
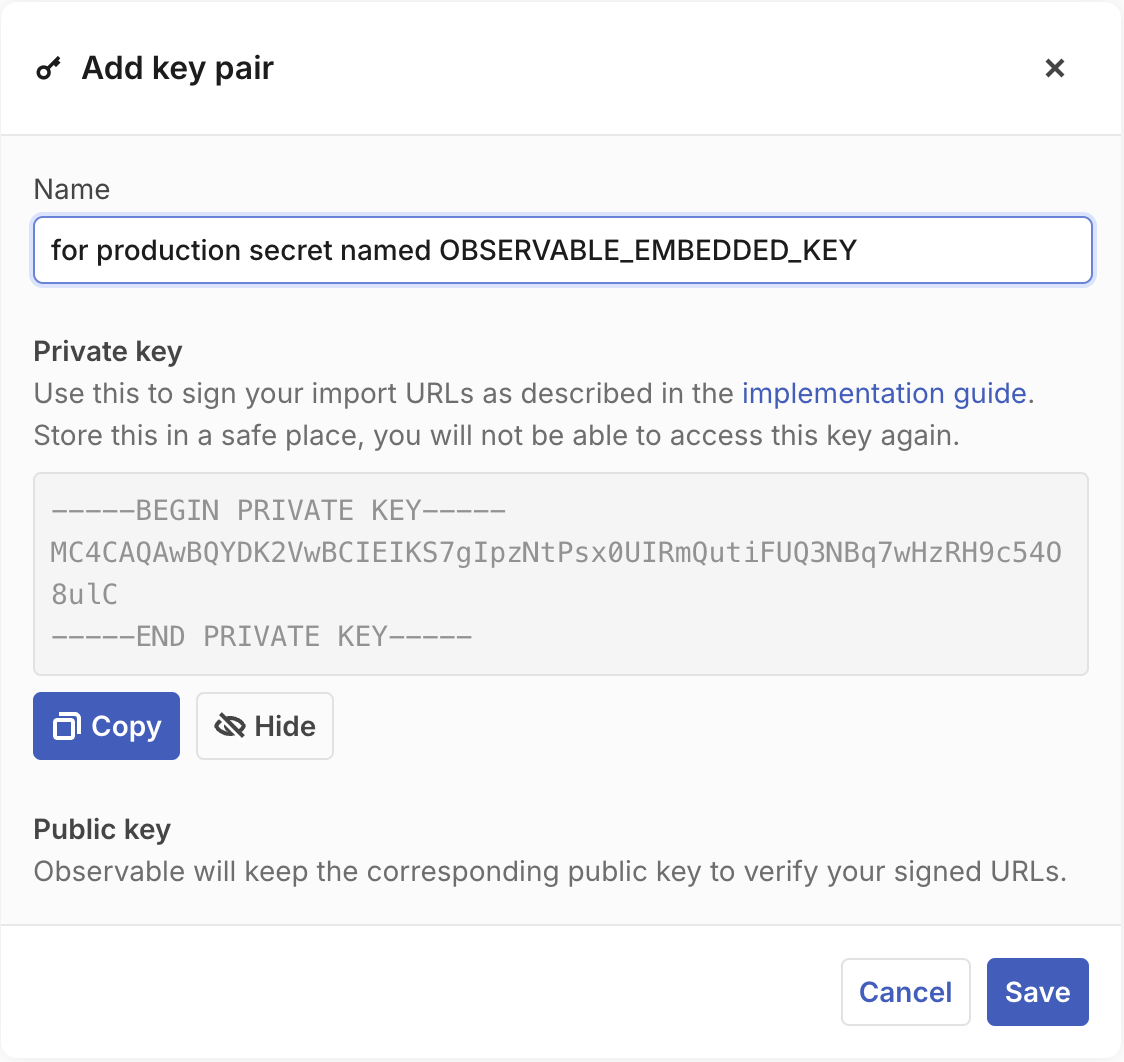
Private data apps can be embedded in other websites, with access control managed by the host site. This is done by generating a signing key in the “Access” tab of a data app’s settings. The key can be used to generate a signed URL that can be embedded in another website.
Signing is done using the EcDSA asymmetric algorithm. When generating a key on Observable Cloud, you will be given a key pair, with a private key that your application uses to sign the URLs, and a public key that Observable uses to verify those signed URLs.


Signed URLs are constructed by adding a token query string parameter to the original URL. The token is a signed JSON Web Token (JWT) that must have the following claims in its payload:
urn:observablehq:path- This custom claim must contain the path of the file being accessed. This is used to verify that the token is being used to access the correct file.sub- The “subject” associated with the token. This must be a user identifier, and will be used for analytics.- If you also use OIDC for data app access, you should make sure to use the same user identifier here.
nbf- The “not before” time". The token will not be valid before this time.exp- The expiration of the token. The token will not be valid after this time.
The maximum lifetime of a token is 2 hours. Tokens with a difference in their exp and nbf times longer than this will be rejected by Observable Cloud.
Generating signed URLs
Signature generation for signed URLs happens on your host application’s backend server. JWT is a standard, and libraries implementing it exist for most environments. For example, in a Next.js application you could use the jose library in getServerSideProps or a server component. In an app with a separate API and frontend, you could do this in an API route. Here’s an example generating a signing a key:
import {SignJWT} from "jose";

const EMBED_PRIVATE_KEY = ...;
const SIGNATURE_VALIDITY_MS = 60 * 60 * 1000;

async function signUrl(url) {
  const parsedUrl = new URL(url);
  const notBefore = Date.now();
  const notAfter = notBefore + SIGNATURE_VALIDITY_MS;
  const token = await new SignJWT({"urn:observablehq:path": url.pathname})
    .setProtectedHeader({alg: "EdDSA"})
    .setSubject("nextjs-example")
    .setNotBefore(notBefore / 1000)
    .setExpirationTime(notAfter / 1000)
    .sign(privateKey);
  url.searchParams.set("token", token);
  return url;
}

const signedUrl = await signUrl("https://acme.observablehq.com/store-stats/pedestrian-chart.js");from urllib.parse import urlparse
import datetime
import jwt
EMBED_PRIVATE_KEY = ...
SIGNATURE_VALIDITY_MIN = 60
def sign_embedded_chart_url(url):
parsed_url = urlparse(url)
nbf = datetime.datetime.now().timestamp()
exp = nbf + (SIGNATURE_VALIDITY_MIN * 60)
payload_data = {
'sub': 'example-user',
'urn:observablehq:path': parsed_url.path,
'nbf': int(nbf),
'exp': int(exp),
}
token = jwt.encode(payload_data, EMBED_PRIVATE_KEY, algorithm='EdDSA')
return f"{url}?token={token}"
signed_url = sign_embedded_chart_url("https://acme.observablehq.com/store-stats/pedestrian-chart.js")Personalization
You can use signing keys to securely personalize content in the embedding application.
- In your Framework data app, use parameterized routes to generate a version of the component for each user.
- In your application server:
- Verify that the user should be able to access the content;
- Pass the user identifier into Framework’s parameterized URL, like
`/${user_id}/chart.js`; - Sign the URL as described above to prevent tampering;
- Pass the full signed URL to your frontend.
- On the frontend, render the embedded component.
Notice that verifying what the user should be able to access is the responsibility of your host application. It can sign whatever URL it wants, and Observable Cloud will serve it if the signature is valid. Your end user will not be able to tamper with the embed URL once it’s signed, because a different path would require a different signature.
Another Framework feature, segmentation, also lets you segment your data apps such that different users see different content at the same paths. When embedding segmented content, choose the segment to be served by adding a claim urn:observablehq:segmentKey to the JWT payload. If one is not provided, the sub claim will be used instead. If a segment was built by the project that matches the provided segment key, it will be served. Otherwise the default segment will be served.
Example signed URL
Here is a breakdown of signed URL generated by the function above:
https://acme.observablehq.com/store-stats/pedestrian-chart.js?token=eyJhbGciOiJFZERTQSJ9.eyJ1cm46b2JzZXJ2YWJsZWhxOnBhdGgiOiIvc3RvcmUtc3RhdHMvcGVkZXN0cmlhbi1jaGFydHMuanMiLCJzdWIiOiI4ZmI3M2I3MjEwNDY0MjVjIiwibmJmIjoxNzMxNDQ0NTMyLCJleHAiOjE3MzE0NDgxMzJ9.JuDmn8djbEuTU8r33nl_2OwsVw6_g8bIq15MIpinxw97hZ4O_Q1qJy2cVON9V3vqBZt2QDYLmQD4FUKkaJ7aDQThe token consists of three base64 encoded parts, separated by periods. When decoded, those three sections are:
- a header specifying its algorithm:
{ "alg": "EdDSA" }- a payload that specifies the required fields from above:
{
  "urn:observablehq:path": "/store-stats/pedestrian-charts.js",
  "sub": "8fb73b721046425c",
  "nbf": 1731444532,
  "exp": 1731448132
}- and a signature that is used to verify the token. Unlike the previous sections, the signature is not JSON encoded. It is a byte sequence used to verify the integrity of the payload.