

Accounts
An Observable account makes it possible for you to use the Observable platform and collaborate with others.
Create an account
To get started, click the Sign up button on https://observablehq.com.
Note
If you fork a notebook before you have created an account, you will be asked to sign up to save your fork; the dialog box will look very similar to the one below.
Continue with… (or email)
After you click Sign Up, you are asked to select an authentication provider. You can choose from several organizations where you may already have an account.

If you choose to sign up with your email address, you’ll receive an email link from notifications@mail.observablehq.com to confirm your email address. (If you do not see the email, be sure to check your spam folder.)
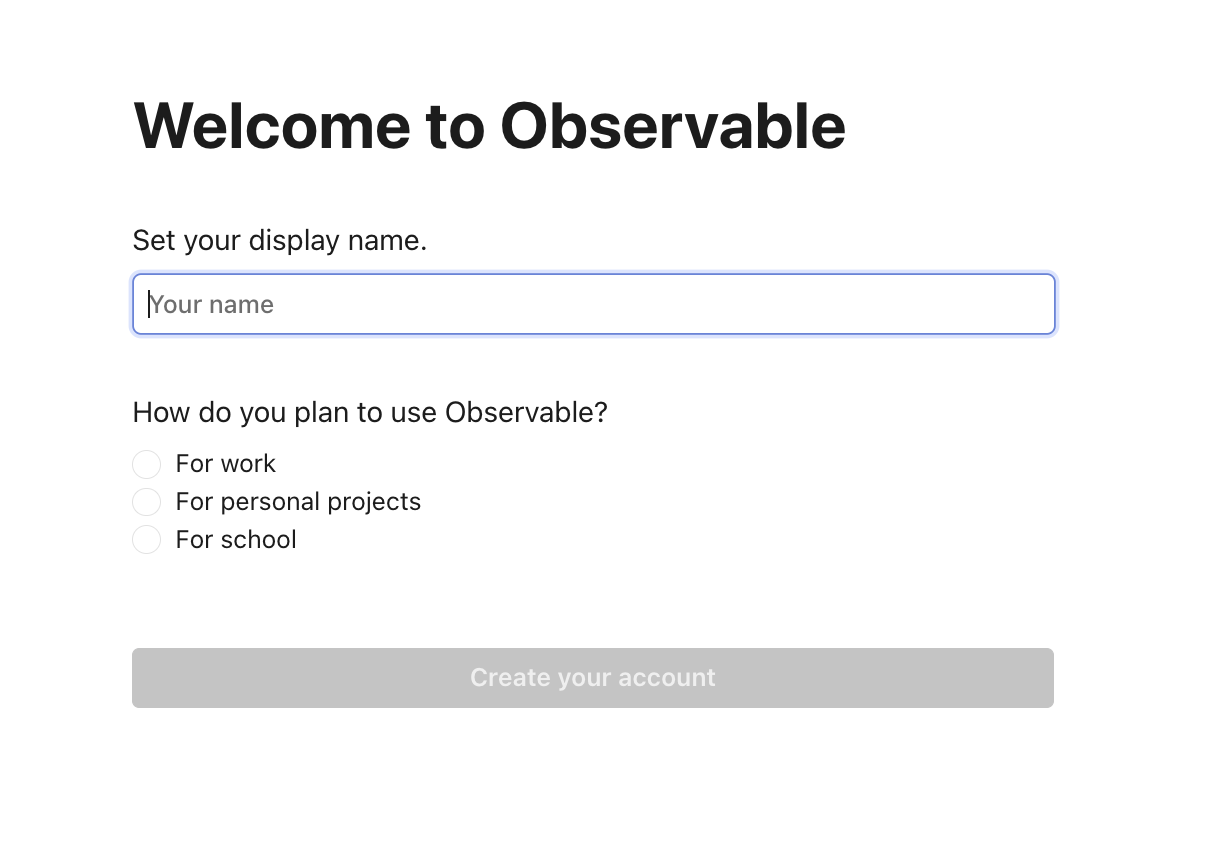
Create your display name
After choosing an authentication method, you’ll see the Welcome to Observable screen where you enter your display name.
Your account profile consists of the following items:
- Avatar: Every user on Observable has an avatar, which either gets auto-populated from your authentication provider or generated by Observable. If you want to change your avatar after signup, go to your Settings and scroll down to Personal profile. You will see a link to upload your own avatar image.
- Display name: This is the name you entered at signup, and appears your profile page, and places like the share modal. You can change your display name at any time by going to your Settings and scrolling down to Personal profile. You will see a form to change your display name.
- Username: Your username was auto-assigned at signup. You can change this name once by going to your Settings and clicking the Change username button. Note that this does not ‘free up’ your existing username, since you may have shared links with this username.
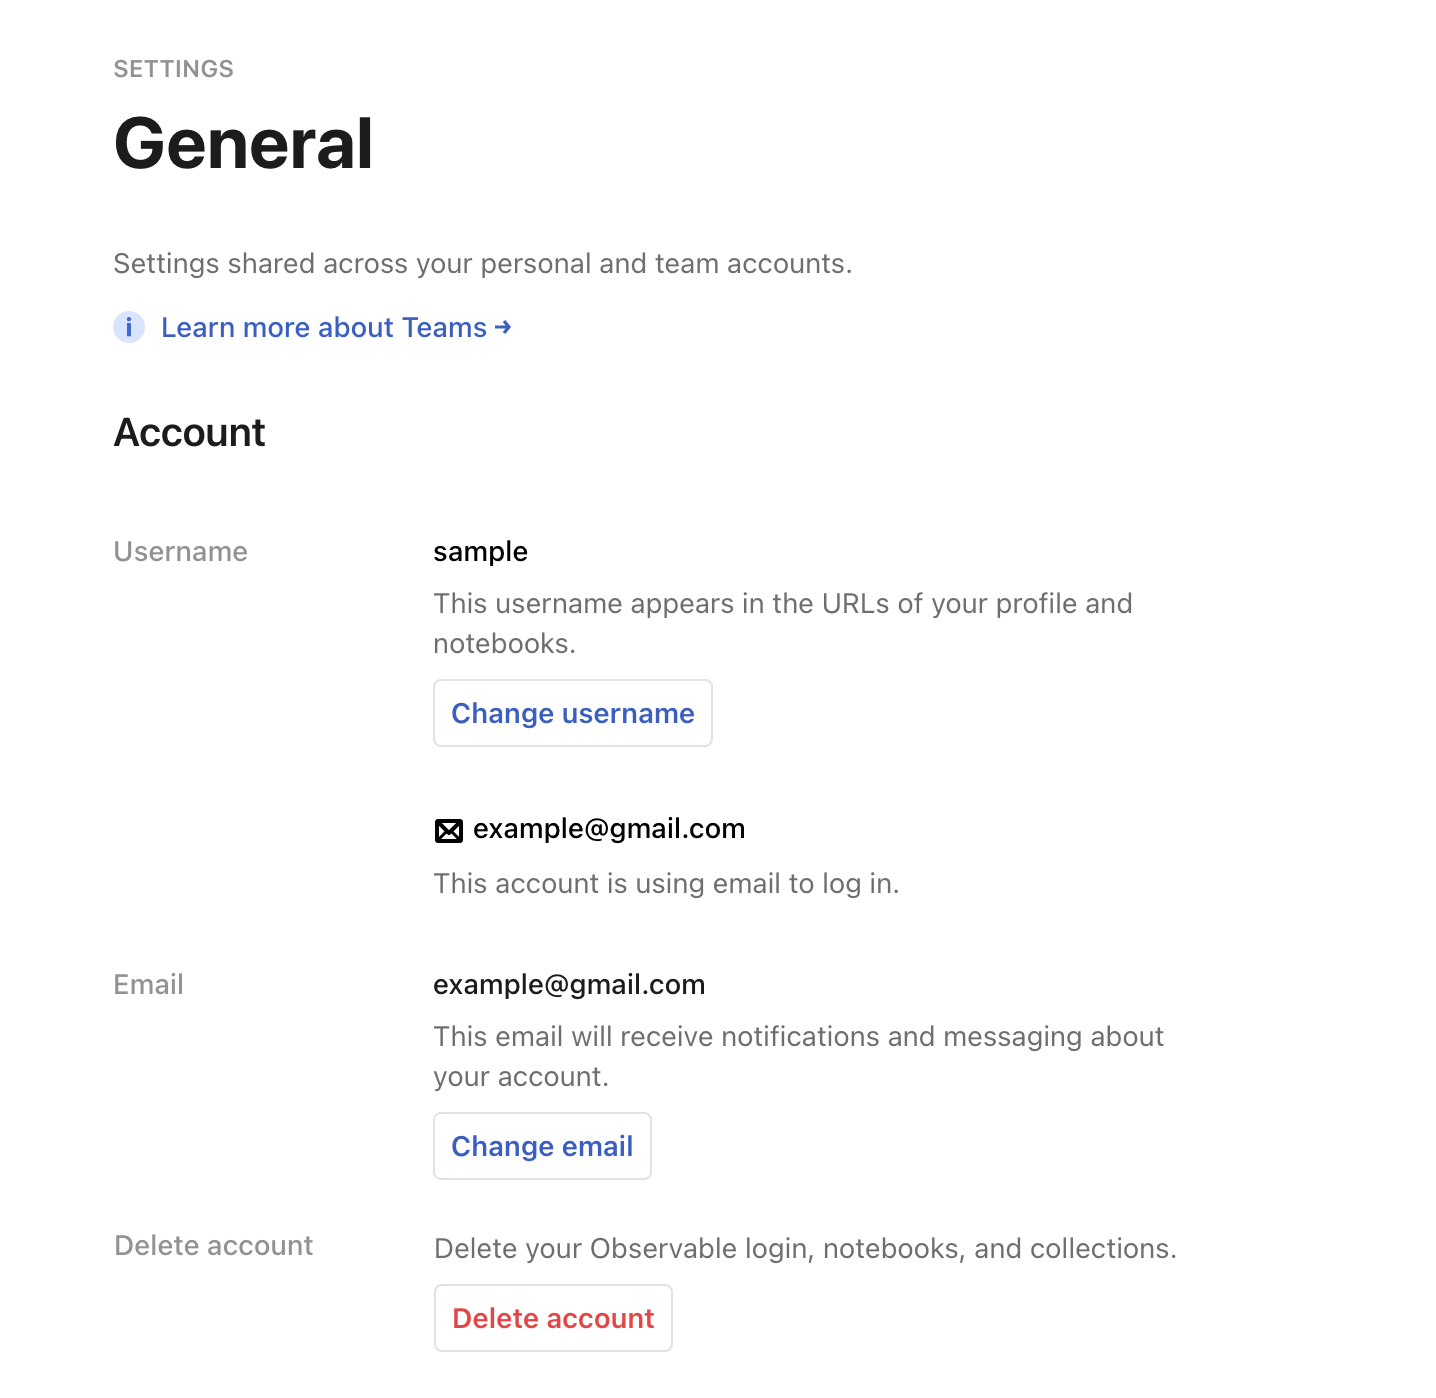
Account settings
General settings
This is where you configure your account, profile, and preferences.
- Account - Set your username, email address and other account settings, as well as delete your account.
- Personal profile - Customize your profile with an avatar, display name, and pronouns. You can view your public profile by visiting the link in this section.
- Editor Preferences - Configure the notebook editor to suit your preferences.
API keys
This is where you can create and manage API keys for your account. API keys are used to authenticate requests to the Observable API, for example when deploying data apps to the Observable Cloud.
OAuth tokens
This is where you can manage OAuth tokens for your account. OAuth tokens are used to list your GitHub repositories for data apps or to allow notebooks to access data in cloud files, like Office 365 or Google Drive.
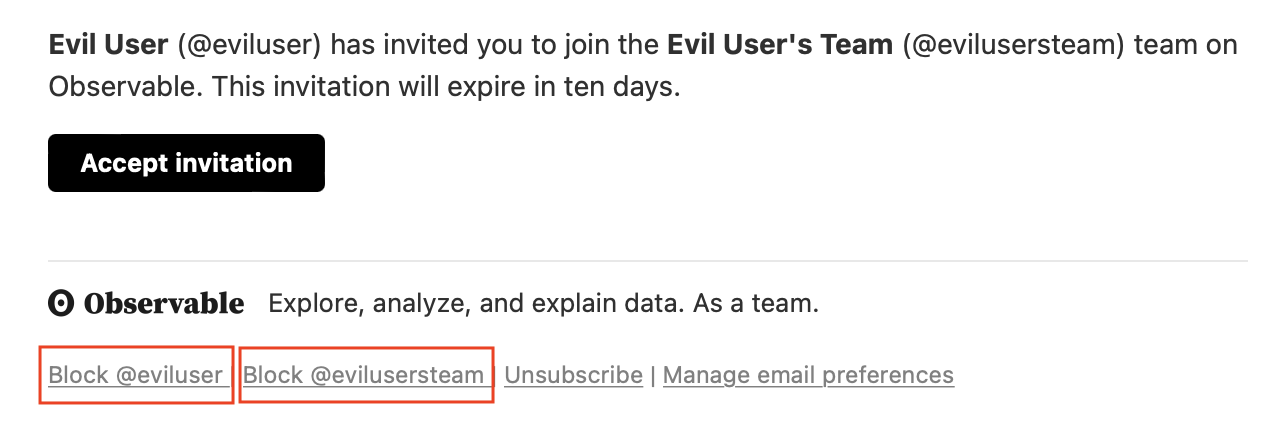
Block list
Enables you to block users or teams from sending invitations to join their team. When you receive an invitation to join a team, a link appears at the bottom of the invitation, enabling you to block the user or the team sending the invitation:
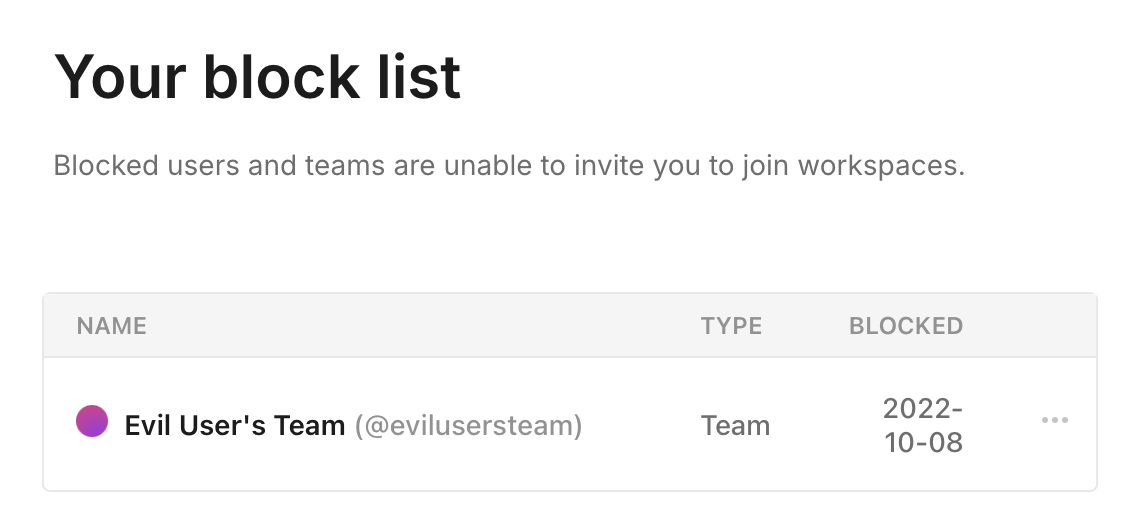
Once you have blocked a user or workspace, it will show up on the Block list page in your account settings:
Delete your account
You can delete your Observable account from your Account page which you can access by clicking on your avatar in the top right of the screen.
Note
Deleting your Observable account means that all of the following will be removed:
- Your authenticated identities/user IDs.
- Your comments in notebooks.
- Your metadata such as secrets, database connections, etc.
In addition, you will be removed from any Observable teams that you are a member of.
Please be certain that you do want to delete your account before proceeding.
On the General page of Settings, click the Delete account button:
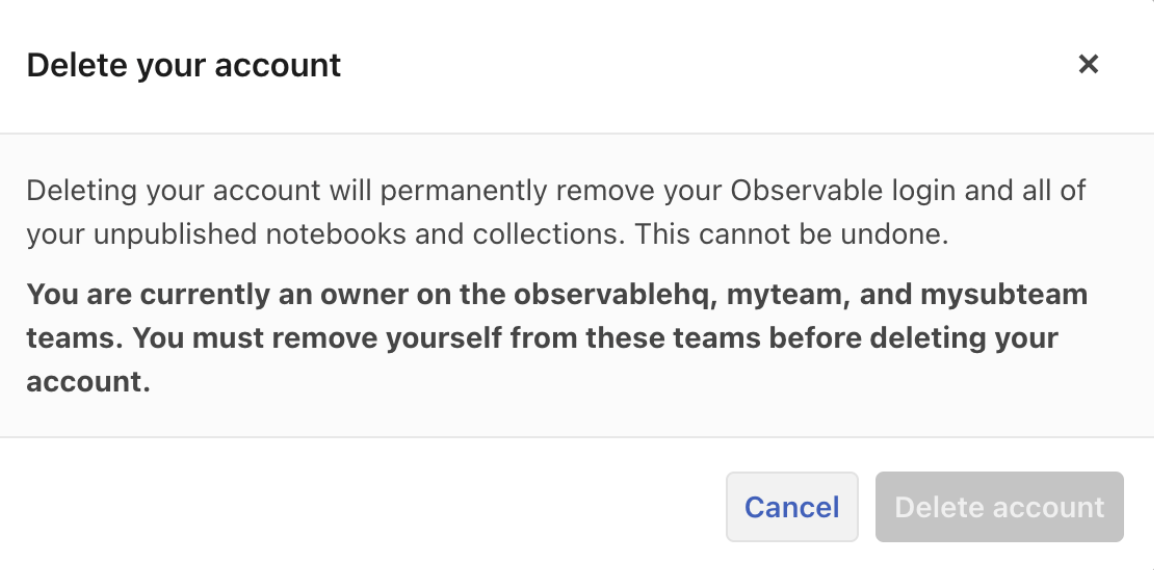
If you are a team owner, you will be asked to first remove yourself from all teams that you belong to:
Note
If you are the only member of a team, you will have to delete the team before you can delete your account. In order to do that, please email support@observablehq.com.
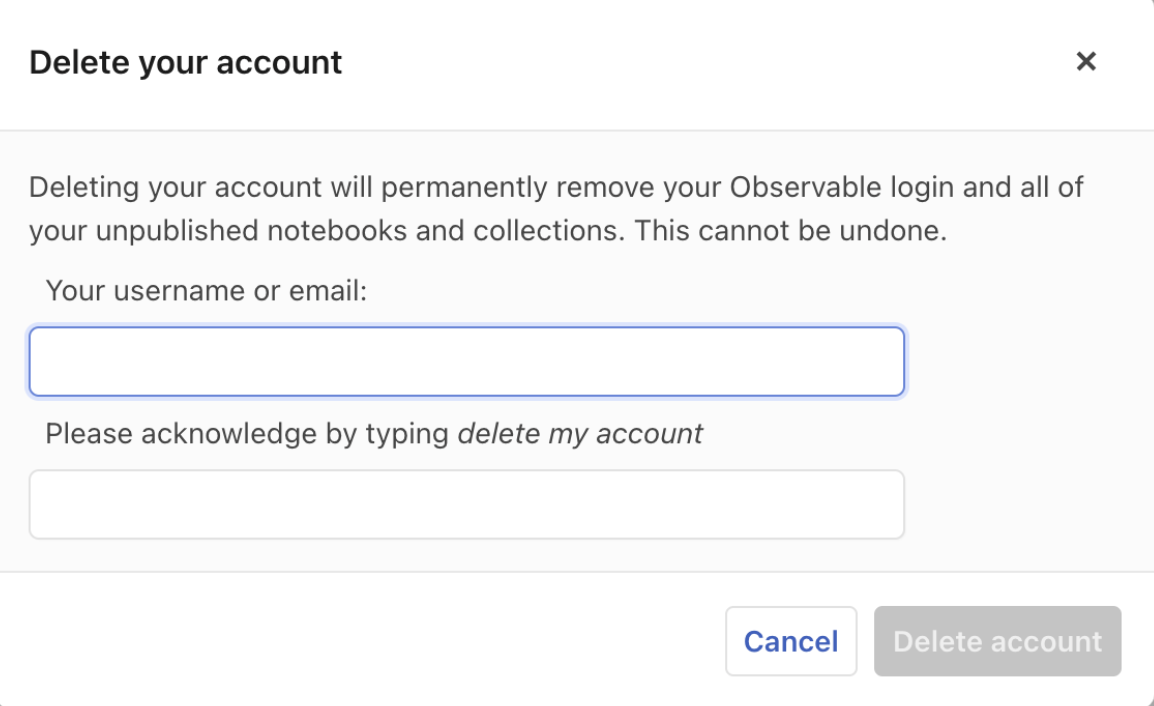
After that, or if you are an individual account owner, you see the following modal:
Your account will then be scheduled for deletion. If you have specified your email address, you will receive an email confirmation of the deletion request.